
One-way window film looks like a mirror from outside during the day. At night, once the lights go on inside, that mirror effect flips, and the glass acts like plain glass instead. This article explains why that happens, what actually controls it, and how to pick the right film for a space that needs privacy both day and night.
One-way window film does not block a view. It reflects some of the light that hits it, lets the rest pass through, and whichever side has more light looks like a mirror. During the day, sunlight outside a typical Seattle office is much brighter than the light inside. That difference is what makes the glass look like a mirror from the sidewalk and clear from the desk.
The film is a thin coated layer stuck onto a sheet of plastic. It does not “know” which way to hide a view. It just sends back a set amount of light, no matter which side that light comes from. What changes is the light levels on each side, and that comes from the sun, not the film.
This answers a question most office managers ask sooner or later: why can’t people see in during the day, while staff inside can still see out? The film is not hiding anything on purpose. It sends back light from whichever side is brighter, and during the day, that’s the outside.
3M calls this number VLT, short for visible light transmitted—the percentage of visible light that passes directly through filmed glass. The lower the VLT number, the darker the film looks, and the stronger the mirror effect during the day. This number matters more than the film’s color. Two films can look almost the same on a sample sheet and still work in different ways once installed.
A film with a VLT near 5 percent gives a strong daytime mirror and lets in very little light (illustrative example). 3M’s window films span a much wider range, from 21 to 70 percent VLT, so a lighter option can still give daytime privacy while keeping the room brighter inside. For offices around Puget Sound, where daylight is short much of the year, that choice matters day to day.
Color adds confusion here. A dark brown or gray film can look private on a sample card without having a low VLT at all. Two films with the same color can have very different VLT numbers. VLT, not color, is what actually decides whether someone outside sees a mirror or a window.
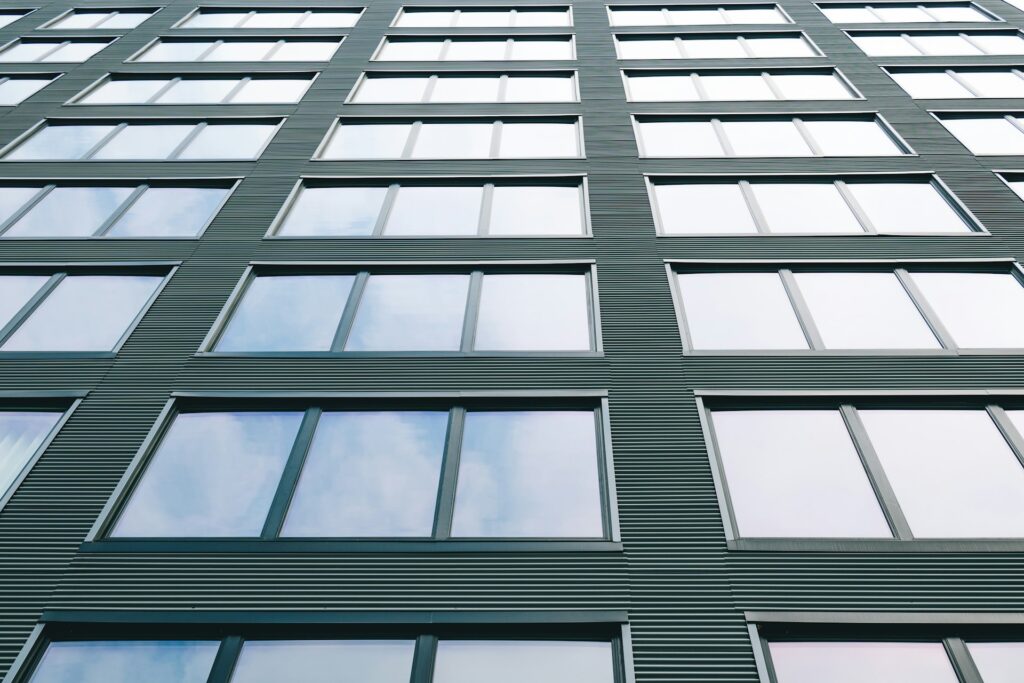
The same rule that makes daytime privacy work also turns against a building after dark. Once office lights turn on, the inside gets brighter than the outside. The mirror effect switches sides. The reflective effect is more noticeable from the brighter side has more light, and after dark, that’s inside the room.
From outside, the same window that looked like a mirror at noon acts like plain glass by 8 p.m. Anyone walking by can see straight into a lit room, desks, whiteboards, and all. This is not a flaw in the film. It’s the same rule working in reverse, and it’s why reflective film alone does not give privacy at night.
Some building managers think a pricier reflective film will fix this. It won’t. A better film blocks more heat and glare during the day. But no reflective film can change which side of the glass has more light once the sun goes down.
Reflective film and frosted film solve two different problems. Mixing them up is the top reason a privacy project falls short. Reflective film depends only on the light difference covered above, so it works best in rooms that stay dim or empty at night. Frosted film, including 3M FASARA, hides the view by scattering light instead of sending it back, so it keeps its privacy no matter which side is brighter.
Here’s how each one performs once the lights come on:
Which one you pick depends less on taste and more on how many hours the room stays lit after dark. We’ve covered how 3M FASARA decorative film works in Seattle clinics, HR offices, and conference rooms in more detail, including where it beats reflective film for evening use.
The day-to-night switch causes the biggest problem in rooms that stay lit after dark and sit in view of a public sidewalk. A few types of buildings run into this again and again:
Seattle office privacy film jobs run into this the most in ground-floor lease spaces near busy streets. Bellevue one-way window film jobs hit the same wall in buildings with evening security or cleaning shifts. The same problem shows up on Puget Sound privacy window tinting jobs for clinics and HR offices, usually after a film was picked on looks alone.
Glass inside a building runs into a smaller version of the same issue. A conference room with glass walls facing a hallway needs a different fix than outside-facing glass, since the lights inside stay on no matter the time of day. That’s a case where frosted or decorative film usually makes more sense from the start.
The right choice starts with one question: how many hours a day does this room stay lit while it’s dark outside? An office used only during work hours may not need more than standard reflective film. A conference room used for evening meetings, or a clinic that runs exams after hours, needs a film built for privacy all day and all night instead.
This is where working with a certified installer pays off. As an authorized 3M dealer, we check window direction, lighting plans, and how a room gets used before we suggest a product, not after. Matching VLT and film type to how a space is really used stops a bad surprise months later: the “privacy film” only worked until 6 p.m.
If your team is still weighing privacy film options, costs, and installation for a Seattle office or conference room, that guide is worth reading first. For frosted or decorative options, more ways to use frosted window film can help you pick a pattern or finish before a site visit.
Not sure which privacy film actually fits your space, day and night? Get a free walkthrough from our 3M-certified team. We’ll match VLT, film type, and installation to how your building really gets used after hours.
The window table is supposed to be the best seat in the house. But by 2 p.m. on a sunny day in July, it’s often the seat nobody wants. Hosts start sending people to tables in the back. The tables by the window, the ones that pull people in from the street, sit empty during the hottest part of the day.
We see this happen at restaurants and cafés across Seattle and Bellevue every summer. The real problem is the glass, not how the room is set up or how staff work. And fixing it does not mean covering up the windows that bring customers in the door.
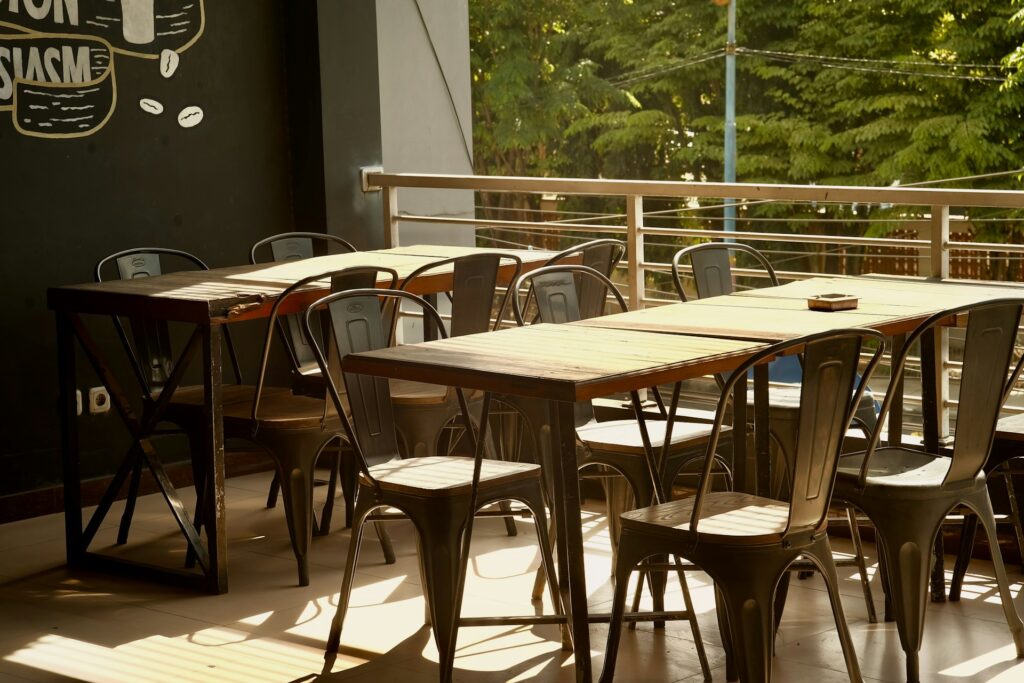
The sun hits bare glass and heats up everything close to it — tables, chairs, and the people sitting there. On a window that faces west, this heat builds up all afternoon and stays through early dinner. Staff notices it fast: the same table by the window stays empty while tables a few feet away fill up first.
For restaurants and cafés, this extra heat adds to a kitchen that is already hot. The U.S. Department of Energy says windows affect end uses that make up about 40% of a building’s total energy use. A kitchen already runs ovens, fryers, and big fridges all day. When the sun also heats up the front of the store, the air conditioner has to work even harder. We cover this same problem in Why West-Facing Offices Overheat by 3 PM, just add a hot kitchen on top of it.
Heat is easy to see. Glare is the problem that costs money without anyone noticing right away. A cash register or order screen near a west-facing window can catch strong sun by mid-afternoon, and the screen becomes hard to read from some angles.
Staff start guessing totals or typing orders again. Small mistakes add up over a busy shift. Menus reflect the same glare, so guests at window tables have trouble reading them too. That slows down ordering during the exact hours a restaurant wants tables turning over fastest.
Pastry cases, wine bottles, and menu signs near the window get more sun than furniture near a normal home window, simply because storefront glass gets more direct sun for more hours each day. 3M’s Prestige Series film blocks up to 99.9% of UV rays. That slows down fading, so displays don’t look dull after a season in the sun.
But heat control matters even more for a storefront. Prestige Series blocks up to 97% of the sun’s infrared light and up to 60% of the total heat that comes through the glass. It does this without making the window darker or changing how the storefront looks from the street. That mix — less heat, same clear glass — matters more for restaurants and cafés than almost any other space we work in, because the glass itself helps bring customers in.
Most restaurant owners try something else first. It helps to know what each option actually does and where it falls short. Here’s how the three most common fixes compare on cost, time, and what they fix.
| Option | What it fixes | What it doesn’t fix | Typical install time |
|---|---|---|---|
| Awnings/umbrellas | Blocks sun for tables right underneath | Doesn’t help tables farther from the window; needs care each season | 1–2 days |
| Full glass replacement | Cuts heat and UV for the whole building | Takes weeks to build, costs more, gets in the way of service | Several weeks |
| Window film | Cuts heat and glare across the whole storefront | Doesn’t shade outdoor patio tables | 1–2 days per window wall |
Film sits in the middle on cost and how much it gets in the way of business. It’s the only fix that treats the whole storefront window at once without touching the building itself. It’s the same commercial window tinting work we do for offices and schools, built for a storefront that has to stay open. On jobs we’ve done for restaurant groups in Bellevue and Seattle, film has fixed heat and glare without closing the dining room or changing how the storefront looks. It also tends to pay for itself faster than replacing the glass—we walk through that math in How Fast Does Commercial Window Film Pay Back.
A restaurant’s window is part of its sign. People walking by see the room, the lights, and the crowd before they even read a menu. A storefront that looks dark or mirrored from outside looks closed, even when it’s open. That’s why we use Prestige Series for restaurant and café windows instead of a darker film. It keeps the glass looking clear from the sidewalk, while it quietly blocks the heat.
Some owners also add a frosted or etched strip along the bottom of the window. It can hold a logo or give some privacy near booth seats, without losing the open feel that brings people in. This fixes a different problem than our retail security film, which is built to stop break-ins, not to fix comfort. See 3M Security Window Film for Seattle Retail Storefronts for that side of storefront glass.
A restaurant can’t close for a week to get its windows filmed, and we don’t ask it to. We plan storefront jobs around business hours — early morning before you open, late at night after you close, or in steps if you want every table open during service.
A normal storefront job takes a few hours per window. A group with several locations can spread the work across a few nights without losing one single service. It’s the same staged plan we use for hotels and offices that stay open, just built around a kitchen and dining room that can’t sit empty for days.
If your window tables have become the seats nobody wants, we’ll come out and check the real problem (heat, glare, or both) and find where it hits hardest during your busiest hours. As a 3M-authorized dealer, DA Customs installs Prestige Series film on a schedule that works around your hours, with a plan built for your storefront and your kitchen’s heat load. Request a free storefront assessment.
A single hot guest room can turn into a bad review before housekeeping even finds out. That risk grows every summer for hotels and short-term rentals across Seattle and Bellevue. Guests now expect air conditioning as normal, not as a bonus. When a west-facing room heats up by mid-afternoon, the property pays for it in refunds, bad reviews, and guests who don’t come back.
The region is cooling its buildings faster than it used to, and that changes what guests expect. Buildings that got by for decades without much cooling are hitting real limits during heat waves now. This article covers where window film fits: guest rooms, common areas, and how to install it without shutting rooms down mid-season.
Seattle hotels used to lean on mild summers and skip heavy investment in cooling. That doesn’t hold up anymore. The U.S. Census Bureau’s American Housing Survey tracks this shift. Across King, Pierce, and Snohomish counties, the share of homes with air conditioning rose from 44% in 2019 to 53% in 2021, a nine-point jump in two years.
Guests booking Seattle and Bellevue hotels increasingly come from homes with AC as standard. Their tolerance for a warm room drops with it. Hotel general managers tell us the same thing this summer: guests who never mentioned room temperature five years ago now ask about it before they book.
Many older hotel buildings and boutique properties still run on window units or partial central air. A full HVAC retrofit isn’t realistic without shutting rooms down for weeks. Stopping heat at the window glass reduces the load on whatever cooling system is already there.
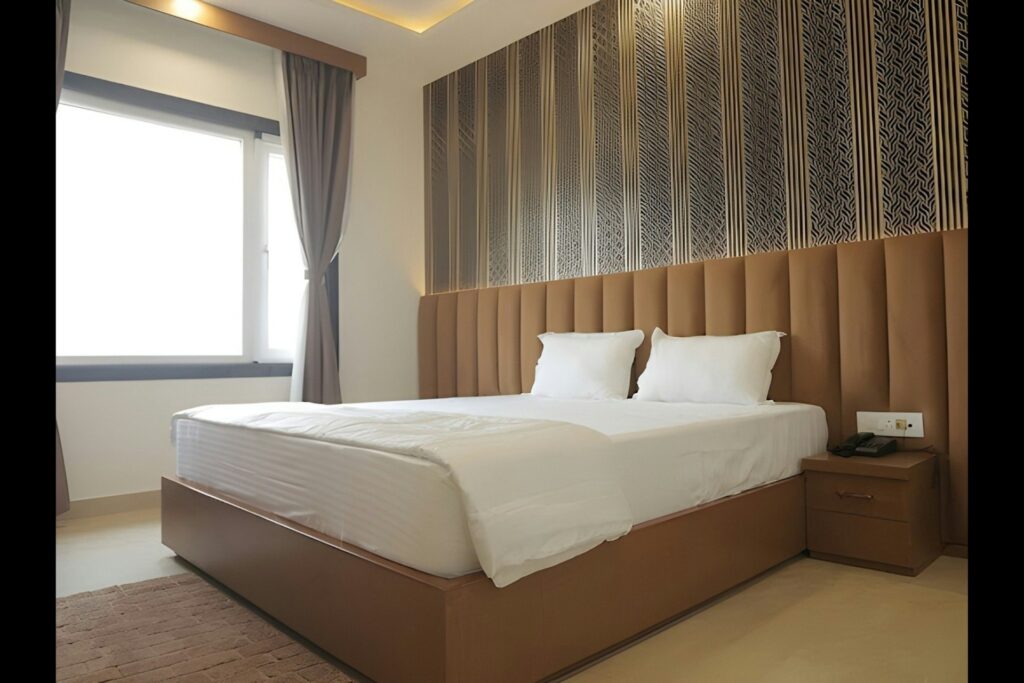
Guest rooms facing west or south heat up the hardest and get the most complaints. Closing the blackout curtains fixes the heat, but it blocks the view guests booked the room for. That trade-off is the problem window film solves.
3M’s Prestige Series window film rejects up to 97% of the sun’s infrared light. It also rejects up to 60% of total solar heat and blocks up to 99.9% of UV rays. It does this without darkening the glass or changing the view much. Guests keep the skyline or water view, and the room stays cooler through the hottest part of the afternoon.
| Prestige Series performance | Rejection rate |
|---|---|
| Infrared light | Up to 97% |
| Total solar heat | Up to 60% |
| UV rays | Up to 99.9% |
These numbers come from 3M’s own specs for the Prestige Series line. On guest-room jobs, we start with west- and south-facing rooms first. Those rooms carry the heaviest heat and get the most complaints on any hot week.
The same film works on lobby walls, restaurant windows, and atrium skylights. Floor-to-ceiling glass is common in Seattle-area hotels built or renovated in the last two decades. These spaces set the first impression for guests checking in. A hot, glaring lobby ruins that impression before anyone reaches the front desk.
Prestige Series film carries a 15-year warranty when an authorized dealer installs it on a commercial building. That matters on large-glass jobs, where a failed seal or peeling film is easy to see and costly to fix. As an authorized 3M commercial dealer, we install it the way 3M requires, so the warranty stays valid.
Glass in public-facing areas often needs more than heat control. A spa entrance, a conference room, or a ground-floor lobby facing a busy sidewalk usually needs some privacy too. 3M FASARA decorative film adds texture or pattern to glass. It blocks the view through the glass but still lets light in.
FASARA can also carry a property’s logo, colors, or directional signs on interior glass. We install it during the same visit as solar film when a property wants both done together. That keeps the work to one scheduled visit instead of two.
A single hot room is a comfort problem. Multiply that heat across 50, 100, or 200 rooms facing the same direction, and it becomes an HVAC capacity problem for the whole property. Rooms that run hotter push window units and central systems harder for longer each day. That shows up on the electric bill during peak season.
In our experience mapping heat floor by floor, west-facing top floors usually carry the highest cooling load. We see this pattern on most mid-rise properties in the region. Cutting heat at the window reduces that load across every room at once, not just the ones guests complain about.
Full HVAC retrofits often mean shutting down rooms or public areas for weeks. That isn’t realistic for an occupied hotel. Window film installation works differently. We schedule it room by room or floor by floor, working around checkout times so most guests never know the work happened.
A phased installation on an occupied property usually follows this sequence:
A single room usually stays out of service for a few hours, not days. For short-term rental portfolios, we can schedule installation around the same cleaning window between guests, so the property doesn’t lose any booking days.
If summer heat is showing up in guest complaints or your cooling bill, we’ll walk the property room by room and build a phased plan around your booking schedule. Schedule a property walkthrough with DA Customs for a room-by-room heat and glare assessment before the next heat wave hits.
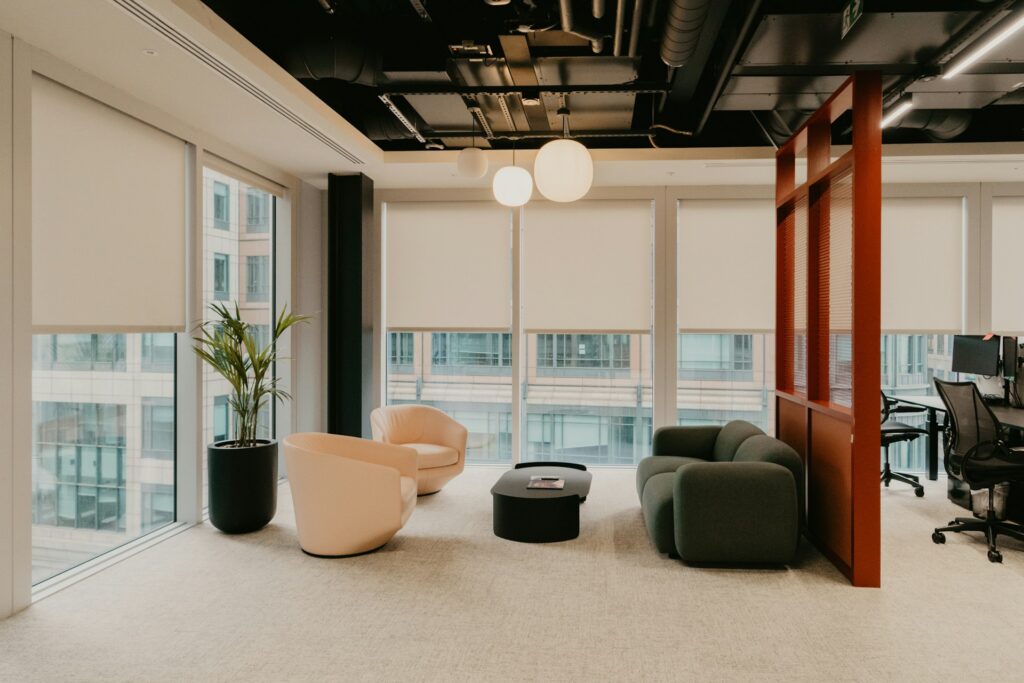
By 2 p.m. on a sunny day, the blinds are down across half the office. The lights are on. Nobody can see the view they’re paying rent for. This is the trade tenants make on sunny afternoons in Seattle and Bellevue office buildings: block the sun, or keep the window.
Property managers hear the same complaint every summer. Tenants want cooler rooms and less glare, but they also want daylight and a usable view. Blinds fix one problem by causing another: comfort at the cost of light. Window film takes a different path. It treats the glass itself, not the room behind it.
This article looks at how each option works. It also covers what U.S. Department of Energy data says about the real source of the problem, and where blinds still make sense despite film’s advantages.
Blinds and film fix heat and glare in different places. Blinds sit inside the room, after sunlight has already passed through the glass and turned into heat. By the time the slats close, that heat is already inside the space, warming the air near the window.
Window film works at the glass, before that happens. A film like 3M’s Prestige Series goes directly on the window and blocks infrared light and UV rays before they get into the building. The room stays brighter because the glass stays clear, and less heat gets in to begin with.
This difference matters more than it sounds. A tenant who closes the blinds trades daylight for comfort. A tenant with film gets both, because the film works on every square foot of glass, all day, without anyone touching a cord.
The U.S. Department of Energy tracks where building energy actually goes, and windows use more of it than their size would suggest. The department’s own numbers show windows account for roughly 10% of a building’s energy use on their own. But they also affect the heating, cooling, and lighting systems that together use about 40% of a building’s total energy.
That 40% covers the three systems most affected by how much heat and glare come through the glass. When those systems work harder because untreated glass lets in too much heat, the building’s energy bill shows it, no matter what’s happening inside the room. Blinds don’t change what happens at the glass. They only deal with the result after it’s already there.
This is why it helps to fix the window itself, not just the room around it. Film cuts the heat and UV that reach the inside of the glass before it becomes a room problem. That’s closer to the real source the DOE points to.
Numbers make this easier to judge than words alone. The table below compares 3M Prestige Series film to what blinds typically deliver in the same office.
| Factor | 3M Prestige Series film | Standard blinds |
|---|---|---|
| Infrared heat blocked | Up to 97% (measured 900-1000nm) | 0%, heat already inside the room |
| Total solar heat blocked | Up to 60% | Varies with slat angle and how often they’re closed |
| UV rays blocked | Up to 99.9% | Minimal, gaps and edges still let UV through |
| View while active | Full view kept | Blocked when closed |
| Coverage | Constant, all day, every window | Only when manually closed |
3M states the Prestige Series blocks up to 97% of infrared light, up to 60% of total solar heat, and up to 99.9% of UV rays. It does this without a metal layer or a tinted look. That matters in South Lake Union towers and Bellevue office parks, where the building’s outside look is part of what tenants pay for.
Blinds don’t have a rejection number, because they don’t block anything at the source. They cover the window instead. That cuts glare in the room, but it does nothing about the heat that already came through the glass. The blind material even gives off some of that heat itself.
Blinds depend on someone using them the right way, every day, on every window. In practice, that rarely happens. Cords tangle, slats bend, tenants forget to close them before lunch, and a west-facing conference room ends up baking by 3 p.m. because nobody adjusted anything.
Film doesn’t have this problem, because there’s nothing to operate. Once it’s installed, it works the same way on day one and in year fifteen. 3M backs it with a warranty. Property managers don’t need to train tenants, swap broken cords, or handle complaints that “the blinds still don’t work” when the real issue is that nobody closed them.
This steady performance often decides the choice for multi-tenant buildings. A leasing team can promise steady comfort with film. With blinds, comfort still depends on what tenants do, and a property manager can’t control that.
Film isn’t the right answer for every case. A fair comparison should say so. Blinds still make sense in a few situations, even in a building that already has film installed elsewhere.
For most Seattle-area office buildings, film and blinds often work together instead of competing. Many buildings use film on all the glass for heat and UV control, then keep blinds only in rooms that need blackout sometimes.
Blinds cost less to put in at first, which is why they’re the default choice in most build-outs. But that first price doesn’t show the full cost of owning them. Cords fray. Slats warp in direct sun. Motorized systems need new parts over time. A property manager pays for all of this again over the life of a lease.
3M backs the Prestige Series with a 15-year warranty on professional commercial jobs. The cost is fixed at install, with no ongoing repair costs added on. Over a 15-year hold, that shifts the comparison from “which is cheaper to buy” to “which costs less to own.”
If tenant turnover already means blinds get replaced or fixed between leases, film’s fixed cost and long warranty often work out better. For a shorter hold, or for rooms that need blackout, blinds still make good financial sense.
The right answer depends on which windows, which way they face, and which tenants complain the most. DA Customs, an authorized 3M dealer, offers a free glare and heat check. We compare how your blinds perform now against what the Prestige Series film could do, room by room. Schedule your free check and get a straight answer on what actually fixes the afternoon heat in your building.
Seattle Public Schools students in grades 1 through 12 return to class on Wednesday, September 2, 2026, according to the district’s official calendar. Count backward from that date, and July looks like the last stretch with any real breathing room for a security window film project.
A site assessment, a quote that clears district procurement, phased access across a campus, and sealant work that needs time to set before doors reopen: that sequence eats an eight-week runway fast. If your district hasn’t scheduled a walkthrough yet, this is the moment to start, not the week before buses roll.
Security window film installation means technicians working room by room with ladders, tools, and staging carts through hallways and classrooms. That’s manageable in an empty building. It’s disruptive, and in some cases unsafe, in a full of students and staff.
On the school jobs we run each summer, the building itself sets the schedule more than anything else does. Custodial teams need access for their own deep-clean and maintenance work. Fire marshals and facilities directors often want final walkthroughs before staff returns for in-service days, which typically land a week or two ahead of students. Once those in-service days start filling the calendar, glass work has to be finished, not just started.
That’s why “install it sometime this summer” isn’t specific enough for a multi-building district. Every week of summer break carries other competing projects, like roofing, HVAC, or flooring, and window film crews need a confirmed date, not a placeholder.
Booking a project now, in July, buys time for three steps that actually determine whether the film is on the glass before the first bell. Here’s what each one covers and why the order matters:
Sealant needs uninterrupted time to bond properly, so projects that start in the final two weeks of summer carry the highest risk of crews working around move-in furniture and freshly waxed floors, or missing the deadline outright. Booking in July gives all three steps room to happen in order.
Washington’s 2025–27 capital budget set aside two separate pools of state money for K-12 health-and-safety facility work, apart from any federal grant program. The Legislature appropriated $15,000,000 for Urgent Repair Grants, capped at $600,000 per district over a three-year period, and $11,000,000 for an Emergency Repair Pool, according to the Office of Superintendent of Public Instruction.
Timing matters here, and it’s worth being direct about it. The two programs don’t work the same way, and knowing the difference saves a district from chasing a door that’s already closed. Here’s how they compare:
| Program | 2025–27 appropriation | Per-district cap | Application status | Best fit |
|---|---|---|---|---|
| Urgent Repair Grant (Form Package 502) | $15,000,000 | $600,000 per 3-year period | Closed November 12, 2025, for this cycle | Planned facility repairs for districts that applied before the deadline |
| Emergency Repair Pool | $11,000,000 | No stated per-district cap | Rolling requires a school board emergency declaration | Unexpected, imminent health and safety hazards |
Districts that didn’t apply to the Urgent Repair Grant by the November 2025 deadline won’t have access to this specific pool for a 2026 project. The next opportunity will come with a future budget cycle. The Emergency Repair Pool stays open longer, but it’s meant for unexpected, imminent hazards rather than a planned security upgrade, so it isn’t a reliable substitute for most film projects.
In practice, that means most districts installing security film this summer are paying out of existing capital or safety budgets rather than a new state grant. We still put together the documentation, glass specs, and cost estimates districts need for the next OSPI cycle or for a local bond or levy request, even when this round’s Urgent Repair Grant isn’t available. It’s worth having that paperwork ready before the next window opens rather than scrambling when it does. We’ve also covered federal grant programs that can apply to security film separately in our earlier piece on federal funding for school safety film.
The 3M Scotchshield Safety & Security Window Film Ultra Series, paired with the 3M Impact Protection Attachment (IPA) Sealant, is built to strengthen weak entry points and help delay intruders, giving staff and students extra response time during a break-in attempt. The film holds shattered glass together instead of letting it scatter, which also matters during storms, seismic events, and accidental breakage.
3M is explicit about what this system does and doesn’t do, and so are we. Here’s the honest breakdown we give every district up front:
Whether the delay is meaningful for a specific opening depends on the glass type, the frame condition, and whether the IPA Sealant is applied correctly to the surrounding frame. That’s exactly why the assessment step isn’t optional.
Warranty coverage for these systems runs between 7 and 15 years, depending on the specific film and sealant combination installed. Only a 3M Authorized Window Film Dealer can carry that warranty and install the sealant to spec. As a 3M-authorized dealer ourselves, that certification is what lets us warranty the system, not just the film. That distinction matters if a district is comparing our quote against a general contractor who isn’t 3M-certified.
Not every pane of glass on a campus carries the same risk, and budgets rarely stretch to cover a whole building in one phase. Ground-floor classroom windows, entry doors, and the sidelights next to those doors are almost always where we start, because they’re the openings closest to grade level and the most likely points of forced entry.
Prioritizing these openings first means a district gets meaningful protection on its highest-risk glass even if the full-building project has to phase across two or three summers. From there, second-floor classrooms and less exposed interior glazing can follow once budget allows.
A district with six or eight buildings rarely tackles all of them in one summer, and trying to force that timeline usually means rushed work somewhere. We typically sequence a phased project around each building’s in-service date, starting with whichever schools bring staff back earliest.
Rather than finishing one school completely before starting the next, we spread the priority openings across every building in the district first. A typical sequence looks like this:
That approach means every campus gets its highest-risk glass covered in year one, even if second-floor classrooms wait until year two or three. It also spreads the cost across multiple budget cycles instead of requiring one large capital outlay.
Coordinating that kind of schedule takes a facilities calendar early, not a phone call in August. If your district is weighing a multi-building project against this fall’s start date, that conversation needs to happen this month.
With eight weeks left before the first bell, the districts that book now are the ones who’ll have their entry glass finished, not half-taped-off, when students walk in on September 2. Reach out to D&A Customs for a free glazing assessment and a phased project proposal built around your district’s actual return date. Get in touch here before the summer window closes.
Open-plan offices and glass-heavy medical spaces are solving the privacy problem the wrong way. Glass walls get torn out and replaced. Frosted glass gets specified during construction and locked in for good. Blinds go up and never come back down. Each fix is either expensive, permanent, or both.
3M FASARA works differently. You apply it to glass that’s already there, choose exactly how much privacy you want, and remove it cleanly if the space changes. Here’s what it does, and where it fits in Seattle-area offices and medical spaces.
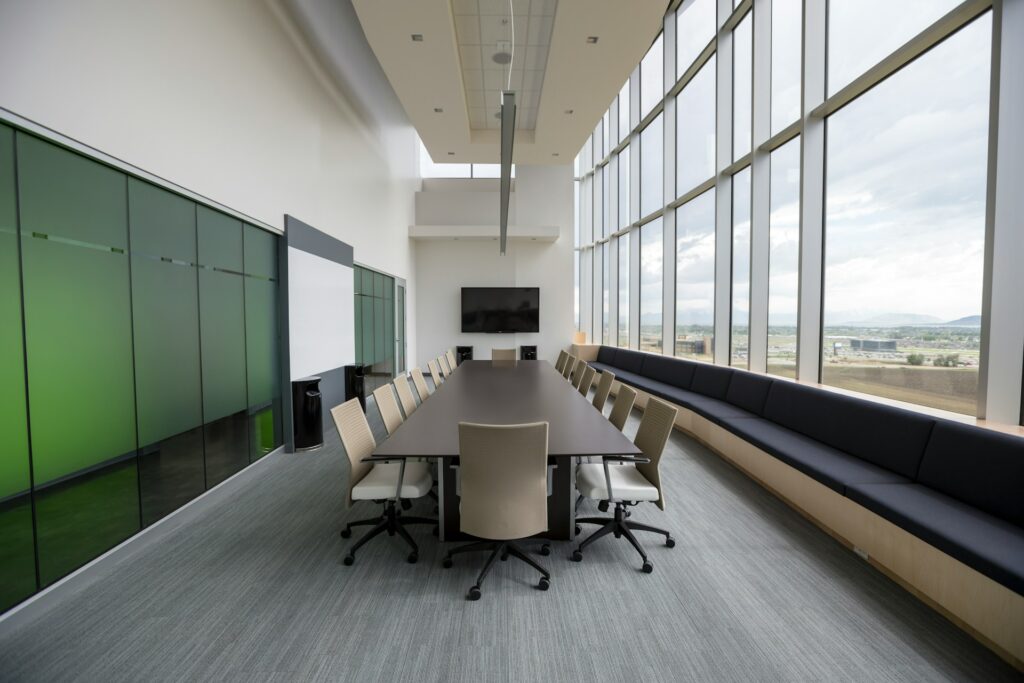
Open floor plans put glass everywhere: conference rooms, HR offices, reception areas, collaboration spaces. It looks great in a listing photo. It’s a problem the first time someone has a performance review or a patient consultation with a hallway full of people walking past.
Healthcare has the same issue in a higher-stakes form. Waiting areas, consultation rooms, and pharmacy counters often sit behind clear glass, which means anyone nearby can see who’s there and sometimes what’s being discussed. HR offices carry a similar weight, since compensation talks, disciplinary conversations, and legal matters don’t belong in a fishbowl.
The usual fixes fall short. Frosted glass is permanent and has to be specified before construction. Blinds defeat the purpose of having glass walls in the first place, and someone has to remember to close them. Partitions cost real money and take the space out of commission during installation.
3M FASARA isn’t frosted glass. It’s a film applied directly to glass that already exists, available in over 100 designs from 3M: frosted, gradient, linen, geometric, and textured finishes among them.
Privacy level is a real choice, not a guess. On the frosted end, patterns like 3M FASARA Lausanne let through roughly 84% of visible light while still obscuring the view. On the opaque end, near-blackout options bring that down to around 19%. That range means you can specify subtle diffusion for a collaboration space or full visual screening for a conference room, without changing products or vendors.
FASARA also blocks at least 99% of UV light, which matters for anything near a south- or west-facing window where fading is a concern. There’s no hardware involved, no special maintenance routine, and no permanent change to the glass itself.
Not every glazed surface needs the same treatment. The right call depends on what happens in the room and who’s walking past it.
Match the pattern to the room’s actual use rather than picking one finish for the whole office. A conference room and an HR office rarely need the same level of coverage.
HHS guidance on the HIPAA Privacy Rule requires covered entities to keep administrative, technical, and physical safeguards in place to limit incidental disclosure of patient information. That’s the kind of accidental exposure that happens when a passerby can see into a consultation room. Visual privacy on glass is one of the physical safeguards that supports that standard. It doesn’t make a space HIPAA compliant on its own, since compliance covers policies, training, and technical controls too, but it’s a practical step toward the physical safeguard the guidance describes.
We installed 3M Prestige 40 exterior film for One Medical in Puyallup, so we’ve worked directly with a healthcare provider’s glass requirements, including scheduling installation around active patient hours. That project used a solar control film rather than FASARA, but the same install discipline applies: no disruption to a working clinic, done in stages if the schedule requires it.
FASARA is also removable without damaging the underlying glass, which matters for clinics operating in leased space where the landlord restricts permanent modifications.
Performance reviews, compensation conversations, and disciplinary meetings don’t belong on display. An HR office with floor-to-ceiling clear glass turns every one of those conversations into something the rest of the floor can half-see, even if they can’t hear it.
FASARA solves this without asking a company to give up the glass. Keep the light, keep the open feel of the space, and add the opacity where it actually matters, usually just the panels facing the main floor, not the whole room.
Glass-walled conference rooms have two recurring problems: presentations visible from the hallway, and confidential video calls that anyone walking by can watch on screen. Neither is a hypothetical in a South Lake Union office with heavy foot traffic between desks.
A mid-opacity FASARA finish addresses both without turning the room into a box. Custom-cut FASARA can also carry a logo or graphic element on the glass, which turns a privacy fix into a small branding opportunity at the same time.
Most commercial leases require tenants to restore the space to its original condition on exit, which makes permanent glass modifications a hard sell to a landlord. FASARA can be applied to existing glazing and removed without affecting the underlying glass, so approval is usually simpler than it would be for etched or replaced glazing.
That flexibility matters most in Seattle’s leased office market, in South Lake Union, downtown Bellevue, and First Hill, where tenants often don’t own the building and need changes that reverse cleanly if the lease ends or the layout changes.
A FASARA installation moves through a few clear stages, starting with a look at the actual glass involved.
As a 3M certified dealer, our installation keeps the FASARA warranty intact. Removable film applied by an uncertified installer can damage the glass on removal and void the manufacturer’s warranty in the process.
Request a decorative film design consultation. We’ll bring the pattern catalog to your office, assess your glass, and give you a specific recommendation before you commit to anything. Contact D&A Customs or call (425) 633-6288.
Retail glass has one job. It invites customers in while keeping the business protected. When it fails, it fails fast. A smash-and-grab on a busy Seattle sidewalk can take under a minute. Security window film does not make glass unbreakable. But it changes the math enough to matter, and that difference is worth understanding before you decide if it’s right for your storefront.
Retail theft is not an abstract risk in this city. In Seattle’s Chinatown-International District, the CID Small Business Relief Team, led by the Seattle Chinatown International District Preservation and Development Authority (SCIDpda), ran a three-year Window Security Film Project from 2022 through 2024. Across three rounds of work, local contractors installed security film on 103 storefronts combined and replaced broken glass or doors for 46 businesses. SCIDpda described transparent security film as one of the most affordable and least disruptive ways to harden a storefront without covering it in plywood.
That program was built around one neighborhood, but the pressure it responded to is citywide. Corridors like Belltown, Capitol Hill, and the Pike Place Market area all share the same trait: ground-floor glass facing heavy foot traffic, day and night. Transparent storefronts are good for business. They’re also the first thing a criminal looks at.
Standard annealed or tempered glass fails all at once. One solid hit opens a hole large enough to reach through, and the entire event is over in seconds. The cost rarely stops at the stolen merchandise. Add emergency board-up, glass replacement, lost operating hours, an insurance claim, and the unsettled feeling staff and customers carry into the store the next day.
The National Retail Federation’s Impact of Retail Theft & Violence 2025 study found retailers reported an 18% increase in the average number of shoplifting incidents in 2024 compared with 2023. That trend line is why more Seattle retail owners are looking at glass as a security gap, not just a design feature.
Security window film is a thick, multi-layer polyester or polyurethane film applied to the interior side of glass. When the glass is struck, the film holds the fragments together instead of letting them scatter. That single property changes the sequence of a break-in. Instead of one clean hit opening a hole, an intruder has to strike the same spot repeatedly, and each extra second works against them.
Here’s what matters most: 3M is direct about the limits of this product. According to 3M’s own product documentation, security window films may reduce the impact of flying glass shards and can help delay intruders under certain conditions, but they do not prevent property damage, injury, or death, and they are not bulletproof or designed to stop an intruder outright. We tell every retail customer the same thing. The value of security film is delay and deterrence, not a guarantee. That honesty is part of what makes the recommendation trustworthy.

Not every security film performs the same way, and thickness alone doesn’t tell the full story. 3M’s Scotchshield lineup gives retail owners a range of options depending on risk level and budget.
| Series | Construction | Thickness | Best for |
|---|---|---|---|
| Safety Series (S40, S70, S140) | Single-layer polyester | 4 to 14 mils | Everyday protection against accidental breakage and lower-risk glass |
| Ultra Series (S800) | Micro-layered polyester | 8 mils | Higher-risk storefronts, schools, government buildings |
| Scotchshield S2400 | Polyurethane | Varies by application | Maximum security priority, paired with the IPA Sealant |
All three options stay optically clear, so merchandise displays and window branding stay visible. For any of them, 3M requires the IPA Sealant for break-and-entry and windstorm applications. The sealant anchors the film to the window frame instead of just the glass, which is what turns a “harder to break” pane into one that stays in the opening even after repeated impact.
Not every retail space carries the same level of glass risk. A quick self-assessment helps narrow down where film makes the biggest difference.
Businesses in more than one of these categories are usually the ones that see the clearest return from a security film installation.
A common concern from retail owners is closure time. In practice, security film installation is one of the least disruptive upgrades a storefront can make. Most jobs run during non-operating hours or overnight, and there’s no glass replacement, no demolition, and no structural work involved.
We schedule around inventory counts and seasonal peaks whenever possible, and a straightforward storefront can usually be completed in a single visit. A site assessment beforehand tells you exactly what to expect: which panes need coverage, how long the job takes, and what the film specification should be for your risk level.
Before requesting a quote, it helps to have a few answers ready. How much street-level glass does your storefront have? Has the location had a break-in attempt before? What’s the approximate value of merchandise near the entry glass? A professional assessment builds on those answers, walking the perimeter, checking glass type and frame condition, and recommending the film tier that matches your actual exposure rather than a one-size-fits-all package.
For a deeper look at how security film compares with standard tint, our earlier breakdown of security film vs. standard window tint covers the technical differences in more detail.
We’re a certified 3M Authorized Dealer, which means the warranty on your film comes directly from 3M, not from an installer who may or may not still be in business in five years. We serve Seattle, Bellevue, Tukwila, Kirkland, Redmond, and Renton, and we’ve installed 3M security and safety film on storefronts, offices, and government buildings across the region. That certification also matters for performance: an uncertified installation can void the manufacturer’s warranty and, in some cases, reduce how well the film actually performs when it’s tested by an impact.
Ready to find out where your storefront stands? Schedule a free storefront security assessment with DA Customs. We’ll walk your glass, evaluate your risk, and recommend the right 3M film specification for your budget. No pressure, no generic package.
When a property manager asks whether window film is worth it, the real question is different. How long until the money comes back, and what does the return look like at year five and year ten? We get this question on almost every commercial bid we quote. So this article skips the vague estimates. We walk through the variables that decide payback speed, and what Puget Sound building owners should actually expect.
We are a 3M certified dealer based in Tukwila and Bellevue. We quote these projects, install the film, and stand behind the warranty. That is the lens here.
No two buildings pay back at the same rate. The number depends on your glass, your building, and the film you choose. Before you trust any payback estimate, check it against these four factors. A good installer will measure all of them before quoting you a return.
When we run an assessment, these four inputs drive the estimate. If someone gives you a payback number without asking about them, the number is a guess.
The strongest case for window film does not come from manufacturers. It comes from federal energy research. DOE research has identified window film as one of the fastest-payback building energy upgrades in many commercial applications.
The DOE puts the baseline payback at roughly three years. Building owners can save as much as 19 kWh per square foot of glass in certain building types and climates, which 3M frames as $1 to $2 in annual energy savings per square foot of film. Across the industry, typical commercial payback runs 3 to 7 years before any utility rebates apply.
Why the range? Because of the four variables above. A heavily glazed building with old single-pane glass stands near the fast end. A newer building with high-performance glazing lands more slowly. The DOE three-year figure is a strong starting point, not a promise for every building.

Most window film articles focus on summer cooling. In Seattle, that misses half the value. Our climate is mild but variable, with cold, wet winters that run long. Film that only fights summer heat leaves money on the table.
In summer, solar control film cuts heat gain and glare on west- and south-facing glass. That reduces the cooling load during the afternoon peak. In winter, Low-E film does the opposite job. It reflects interior heat back into the room instead of letting it escape through the glass.
This matters more than people expect. Nearly 40% of heating loss in commercial buildings happens through windows, according to DOE data cited by 3M. A single-pane window upgraded with 3M Thinsulate film performs close to a double-pane window, improving its U-value by up to 40%. For a Puget Sound building, that turns film into a 12-month investment, not a summer fix.
Numbers land better with context. The ranges below show how payback shifts by building type. Treat them as illustrative. Real results depend on an on-site assessment of your glass and orientation.
| Building type | Glass situation | What drives the payback |
| Mid-size Bellevue office (single-pane or older double-pane) | Large west-facing glazed area | High cooling load reduction; faster payback |
| Pike Place or Capitol Hill retail storefront | Street-level display glass, high foot traffic | Solar control plus comfort; moderate payback |
| Medical clinic | Mixed glazing, privacy and UV needs | Combined value beyond energy; comfort and UV speed the case |
The examples below are for illustration only. Actual payback depends on glass type, orientation, utility rates, building occupancy, and film selection. Seattle and Bellevue also have higher labor and energy costs than many U.S. markets, which can affect both project cost and potential savings.
| Example Building | Glass Area | Film Type | Illustrative Payback |
| Bellevue tech office | 4,000 sq ft | 3M Prestige 70 | 3–5 years |
| Seattle medical clinic | 2,500 sq ft | 3M Prestige 40 | 4–6 years |
| Capitol Hill retail storefront | 1,200 sq ft | 3M Prestige Series | 4–7 years |
| Older office with single-pane glass | 3,500 sq ft | 3M Thinsulate | 3–5 years |
A property manager weighing window film usually has other options on the table. Window replacement, HVAC upgrades, or interior blinds all promise comfort. Here is how film stacks up against each.
Against window replacement, film costs a fraction of the price. The DOE ranks film among the fastest-payback energy upgrades, while full window replacement carries a much higher upfront cost and forces tenant disruption. Film requires no structural work and no glass removal.
Against an HVAC upgrade, film does not compete. It complements. Film reduces the cooling load coming through the glass, so the HVAC system handles less. We tell clients to fix the building envelope before sizing up mechanical systems, because oversizing HVAC to fight solar gain wastes capital.
Against blinds and shading, film works without blocking the view or requiring daily management. Blinds get pulled down and stay down, which defeats the point of having glass at all.
Energy savings are the obvious return. For Class A and Class B buildings, there is a second financial layer that property managers in competitive markets care about. Window film contributes to recognized building performance standards.
3M Window Films can improve a building’s ENERGY STAR Portfolio Manager score, the benchmark used to compare buildings of similar size and rate them on a 1-to-100 scale. A higher score helps with tenant attraction and refinancing in a market like Bellevue or downtown Seattle. Many 3M films also qualify for LEED credits in categories like Optimize Energy Performance and Daylight and Views.
One technical point worth knowing: 3M Window Films are certified by the NFRC, the same body that certifies windows. The film carries measured performance values, not marketing claims. On the sustainability side, some 3M films become carbon negative within six months of installation, which matters for owners tracking ESG targets.
For competitive office buildings, these are real line items, not footnotes. They affect leasing, refinancing, and certification, all of which carry dollar value beyond the utility bill.
Payback math assumes the film performs for its full lifespan. That assumption breaks if the installation does. The installer is part of the ROI calculation, not a detail to sort out later.
The 3M warranty only applies when a certified dealer installs the film. Uncertified installers cannot provide the manufacturer’s warranty, and incompatible film on the wrong glass type is a common cause of failure. Commercial coverage typically runs up to 10 years. That coverage protects the savings you are counting on across the payback period.
As a 3M certified dealer, our installs carry the manufacturer’s warranty directly from 3M. A common cause of film failure is an incompatible product applied to the wrong glass type by an uncertified installer. When you calculate a ten-year return, that warranty is what makes year ten as reliable as year one.
If you are building a capital improvement case, you need a real payback figure, not a national average. We will measure your glazed area, check your building orientation, and assess your current glass spec. Then we give you a realistic payback estimate for your building before you commit to anything.
Request a free on-site energy assessment at da-customs.com/contact, or call 425 633 6288. We come to your building, run the numbers, and give you a clear recommendation you can take to ownership.
Seattle has a reputation for rain and clouds. What it doesn’t advertise is what happens when the sun breaks through in June, July, and August, particularly in the afternoon. West-facing glass in South Lake Union, downtown Bellevue, and the Eastside tech corridor turns into a radiator by mid-afternoon. ACs run at full capacity, blinds go down, views disappear, and nobody in the perimeter zone can look at a screen without squinting. The problem isn’t your HVAC system. The problem is the glass.
We’ve been installing commercial window film across Puget Sound for years, and the west-facing afternoon heat complaint is the most consistent thing we hear from facility managers in the summer. This article explains why it happens, what’s actually driving the heat, and what a single installation can do about it, without darkening the office or disrupting operations.
Seattle sits in DOE Climate Zone 4C (the Marine classification). That means cool, wet winters and mild summers, but “mild” doesn’t mean problem-free when it comes to solar gain. Because Seattle is relatively far north (latitude ~47°N), the summer sun travels a lower arc than in sunbelt cities. By mid-afternoon, the sun shifts into a position where west-facing glass receives far more direct exposure than it does earlier in the day.
This matters because glass is most vulnerable to solar penetration when sunlight hits it straight on. South-facing windows deal with high-angle noon sun that roofs and overhangs can partially block. West-facing glass in the afternoon gets no such relief: the sun is right at eye level, and there’s nothing in the building envelope standing between it and the interior. Some waterfront properties may also experience additional glare from reflected sunlight.
Seattle’s overcast baseline also works against most buildings here. Because sunshine is intermittent for most of the year, facilities are typically under-equipped for when it actually arrives. Buildings in Phoenix have solar control as standard. Buildings in Seattle often have single or older double-pane glass with no additional film, which is fine 200 days a year and a real problem on the 40 sunny summer days when occupant complaints spike.
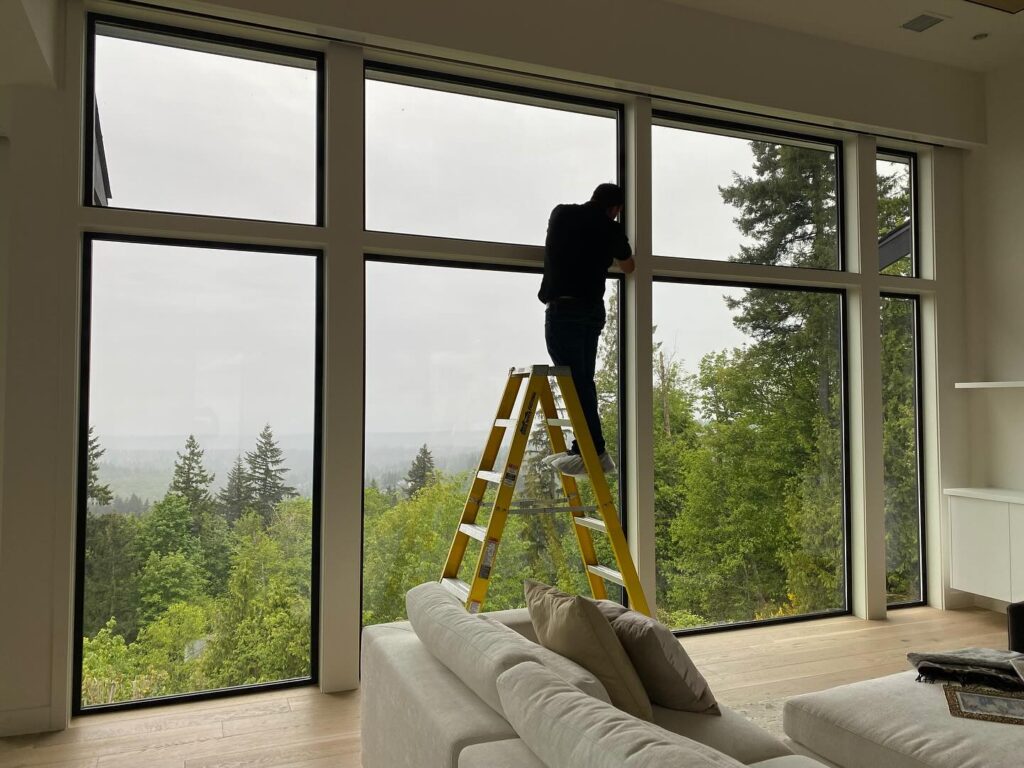
Most of the heat associated with sunlight comes from infrared radiation, though visible light can also contribute after it is absorbed by interior surfaces. Infrared arrives before your occupants consciously notice the temperature change. By the time the perimeter zone feels hot, the heat has already been accumulating for over an hour.
The result is a predictable sequence of problems across the afternoon:
Glare is the other piece of this. According to the American Optometric Association, 58% of office workers experience digital eye strain, and afternoon sun washing out west-facing monitors is one of the most direct causes. A Cornell University study found that optimized daylighting (light without glare) reduced eye strain symptoms by 84% and cut drowsiness by 10%. The goal isn’t darkness. The goal is controlled light without the heat spike that makes perimeter zones unusable.
The instinct for most facility managers is to tint the glass, and standard tint does reduce solar gain, but by reducing visible light transmission across the board. A basic reflective film blocks heat by blocking everything, which turns bright, productive office space into something that feels like a cave. For tech offices in SLU or Bellevue with floor-to-ceiling glass, that’s not a viable trade-off.
The technology that actually solves this is spectrally selective film. Instead of blocking all wavelengths equally, it targets the infrared spectrum (the wavelengths responsible for heat) while leaving visible light mostly intact. Visible Light Transmittance (VLT) is the key number: it tells you how much natural light passes through. With standard tint, higher VLT means weaker heat rejection. With spectrally selective film, the two aren’t linked — you get both.
Here’s how the two approaches compare on the metrics that matter for an office building:
| Standard Reflective Film | 3M Prestige (Spectrally Selective) | |
|---|---|---|
| Visible light blocked | High — office noticeably darkens | Low — natural appearance maintained |
| Infrared rejection | Moderate | Up to 97% |
| Exterior appearance | Mirror-like | Clear, low-reflective |
| Signal interference | Possible (metallized construction) | None (non-metallized) |
| Commercial warranty | Varies by product | Up to 15 years via certified dealer |
The difference in practice: a Prestige 70 film allows 70% of natural light through and still outperforms standard tint at 20 VLT on heat rejection. That’s the technology gap between the two product categories.
3M Prestige Series films reject up to 97% of the sun’s infrared light and block up to 99.9% of UV rays, while maintaining low interior and exterior reflectivity. There’s no mirror-like exterior finish: the glass looks like glass. From inside the building, views remain clear. The film operates invisibly, which matters for offices where aesthetics and client-facing appearances are part of the environment.
The headline performance numbers from 3M’s product documentation:
The SHGC (Solar Heat Gain Coefficient) is the technical metric used to compare window performance before and after film. Film lowers the effective SHGC of your existing glass without replacing it. For a west-facing office building running older double-pane glass, the improvement from Prestige 40 or Prestige 70 is the difference between a cooling system fighting the glass and a cooling system doing its actual job.
As a 3M certified commercial dealer, we install Prestige with the full 3M manufacturer warranty, which for commercial applications runs up to 15 years. That warranty is only valid through certified installers. An uncertified installation using the same film product loses the manufacturer warranty entirely, which is worth understanding before accepting a lower quote from a non-certified shop.
We’ll give you the honest version, not the sales version. Window film doesn’t replace HVAC; it reduces the thermal load your HVAC system has to manage. On west-facing glass in a Bellevue tech office or a South Lake Union professional services building, the practical outcomes are fewer perimeter zone complaints, more comfortable working conditions near the glass, and lower peak cooling demand on hot summer afternoons.
The energy data backs this up. Approximately 33% of commercial cooling costs come from solar heat gain through glass, and on a building with significant west-facing glazed area, that’s a meaningful share of the utility bill. The DOE recognizes window film as one of the fastest-payback commercial energy conservation technologies, with a baseline payback of approximately three years.
Installation typically doesn’t require closing the office. We schedule commercial projects around operating hours, often early morning or weekend installs for client-facing spaces. For most office floors, a full installation takes one to two days. The film cures within 30 days, during which some minor haziness is normal; after cure, performance is immediate and consistent for the life of the film.
We’ve completed commercial installations for clients including One Medical, a healthcare provider with specific requirements around occupant comfort and glass performance. West-facing office heat is a problem we’ve solved many times in this market, and the results are consistent.
You don’t need a formal energy audit to determine whether window film is worth investigating. A focused walk-through during peak afternoon hours tells most of the story. Here’s what to look for:
If you manage multiple tenants or a large floor plate, a quick survey of facilities staff about where heat and glare complaints originate will focus the assessment on the areas where film will have the most impact.
We’re a 3M certified commercial installer with two locations serving Tukwila and Bellevue, which means we’re local to the buildings we work on, not dispatching crews from out of region. In March 2026, we received 3M’s recognition as Best New Dealer on the West Coast, a distinction that reflects installation quality and process rather than sales volume.
We don’t do residential tinting. Commercial window film is what we do, and we know the specific requirements of Seattle and Bellevue office buildings: lease considerations, building management approvals, after-hours installation logistics, and the glass compatibility assessment that determines which film spec is correct for your existing glazing. If you’ve been comparing film quotes and getting different product recommendations from different vendors, we’re glad to explain why: sometimes it’s a legitimate difference in film selection, and sometimes it’s a spec mismatch that matters once the film is on the glass.
If you’re weighing this against an HVAC upgrade or other building improvements, our comparison of HVAC vs. 3M commercial window film covers the cost math directly.
We offer free on-site assessments for commercial projects. We visit your building, evaluate the west-facing glass, confirm glass compatibility, and give you a clear product recommendation and realistic expectation before any commitment.
Request a free assessment at DA Customs, or call us directly at 425 633 6288.
May is when most property managers finalize their summer cooling budgets. HVAC upgrades are the default answer: more tonnage, newer units, smarter controls. But there’s a question worth asking before the budget gets committed: what’s actually causing the heat problem? For many Seattle office buildings, the answer is glass.
Seattle’s commercial building stock wasn’t built for heat. Before June 28, 2021, the region had recorded only three days above 100°F in its entire history. That summer, temperatures hit 108°F over three consecutive days. Property managers added portable cooling units, HVAC contractors ran six-week backlogs, and buildings designed for mild Pacific Northwest summers became genuinely unlivable.
We’ve assessed many commercial properties in the Puget Sound since that summer. The pattern is consistent. Buildings added cooling capacity under pressure and at peak contractor pricing. Most are still dealing with the same complaint: the west and south sides of the floor are 10–15°F hotter than the rest, perimeter workstations are miserable in July, and the AC runs constantly without reaching setpoint.
On a recent job at a Bellevue office, the facility director told us they’d replaced two rooftop units the year before and still had tenants calling in heat complaints every afternoon. We assessed the west facade, floor-to-ceiling glass with no tinting or treatment. The problem wasn’t the equipment. The cooling budget goes up. The underlying cause stays the same.
Solar Heat Gain Coefficient (SHGC) measures what fraction of the sun’s heat passes through a window and enters the building. Standard commercial glass without treatment carries an SHGC of around 0.70–0.87. That means most incoming solar energy enters the space directly.
According to the U.S. Department of Energy, solar heat gain through windows accounts for roughly one-third of a commercial building’s total cooling load. That’s a structural cause, not a minor inefficiency. The HVAC system on a west-facing floor in Seattle is fighting a heat source positioned three feet from every employee near a window, and the load peaks in the afternoon, when the system is already running hardest.
Adding cooling tonnage addresses the effect. It doesn’t change how much heat is entering the building each hour. We explain this on every commercial assessment we run, because it changes how property managers think about the capital decision.
Replacement costs vary based on what you’re replacing and how accessible it is. A single rooftop unit serving a smaller commercial space runs $15,000–$30,000 installed for buildings in the 2,000–5,000 sq ft range. For a 5,000–15,000 sq ft office, a typical mid-size Seattle floor plate, expect $15,000–$50,000 per unit replacement, including electrical integration and controls. Larger buildings needing multiple units or chiller systems can run well past $50,000.
Seattle-specific factors push these numbers higher. Rooftop access in urban buildings requires crane time, adding $1,000–$3,000 per placement. Upgrading to newer controls or integrating into a building automation system adds another $2,000–$10,000. A Seattle City Light case study of a 70,000+ sq ft South Lake Union office showed a major HVAC controls upgrade at $122,000, with base and performance incentive recovery of up to $40,000 after one year of verified savings.
Seattle City Light’s 2026 commercial incentive schedule does offer rebates worth claiming: advanced rooftop controls qualify for $120–$500 per ton, and heat pump and fan system improvements earn $0.36 per kWh saved. These help offset capital cost, but the net outlay for any meaningful cooling upgrade is still well into five figures.
The honest limitation of any HVAC upgrade: once the new equipment is running, the solar load coming through the glass is unchanged. You’ve invested in handling the heat better. You haven’t reduced how much heat enters.
3M solar control films for commercial applications run $5–$8 per sq ft installed for standard options. The 3M Prestige series, designed to reject up to 78% of solar heat while maintaining visible light transmission above 70%, typically runs $10–$12 per sq ft installed. The total project cost depends on your glass area, building access, and the film spec that best fits your glass type.
What the film does is documented, not estimated. As a 3M-authorized dealer, we produce the Solar Heat Gain Coefficient before and after installation for every commercial project, specific to that glass-film combination. A property manager gets a real number, not a marketing range. For a building with standard commercial glazing, the right 3M solar control film cuts the heat entering through that glass by more than half.
The Department of Energy ranked window film among the top 50 commercially available energy conservation technologies, citing a typical payback period of around three years. 3M’s own data puts annual savings at $1–$2 per sq ft of film installed, or up to 19 kWh per sq ft of glass treated. Where your building lands in that range depends on sun exposure, existing glass type, local electricity rates, and the specific film installed.
Glass compatibility matters more than most installers acknowledge. Certain film types applied to older double-pane units can cause thermal stress that cracks the seal. Before we specify any film, we assess the existing glass type and frame condition. Every project. It’s not an upsell, it’s what prevents a warranty claim two years later.
The figures below use a hypothetical 20,000 sq ft Seattle office building with 4,000 sq ft of treated glass on south and west exposures. These are illustrative examples within verified cost ranges — actual project costs require an on-site assessment.
| HVAC cooling upgrade | 3M commercial window film | |
| Upfront cost | $30,000–$60,000 (2 RTU replacements, crane, controls) | $20,000–$48,000 (4,000 sq ft, standard to Prestige) |
| Estimated net cost | $15,000–$45,000 after SCL rebates | $12,000–$48,000 |
| Annual energy savings | 10–15% reduction on affected zones | $4,000–$8,000/yr ($1–$2/sq ft × 4,000 sq ft) |
| Typical payback period | 5–10 years | 3–6 years |
| Reduces solar load? | No — heat through glass unchanged | Yes — 50%+ reduction through treated glass |
| Disrupts operations? | Yes — equipment replacement, possible tenant notice | Minimal — most floors completed in 1–2 days |
| Product lifespan | 15–20 years (equipment) | 20–30 years (3M film with warranty) |
Neither scenario is wrong. They’re solving different problems, at different costs, with different payback profiles.
HVAC equipment has a lifespan. If your rooftop units are approaching 15–20 years old, you’ll replace them regardless of what else is in the budget. The question is sequencing.
Either way, window film and HVAC improvements compound rather than compete. Film makes any cooling system run less hard. HVAC ensures you have capacity for peak demand. Most Seattle commercial buildings need both eventually — the decision is which problem is costing you money this summer.
We offer a no-cost on-site assessment for commercial properties in Seattle, Bellevue, Tacoma, Kirkland, and Renton: glass compatibility check, sun exposure analysis by facade, and a 3M film specification with a projected SHGC reduction and energy savings estimate — before you commit to anything. As a 3M-authorized dealer, our recommendations are tied to verified product data, not a rule-of-thumb range.